Bamboo Tips - Tutorials - 2 Strip Quads |
|
< Home < Tutorials < 2 Strip Quads 2 Strip Quads By Tom Smithwick
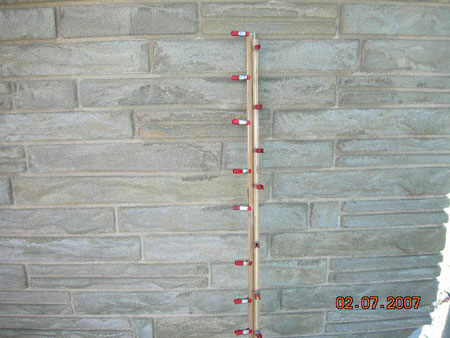
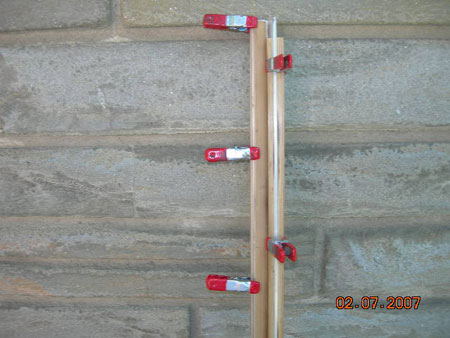
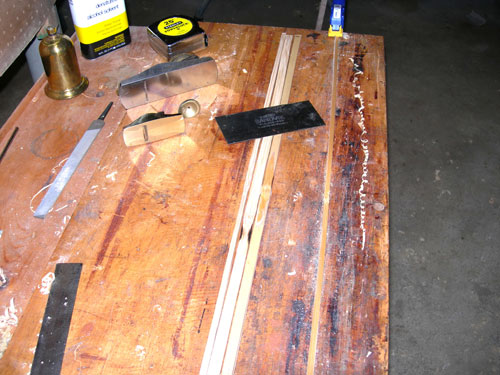
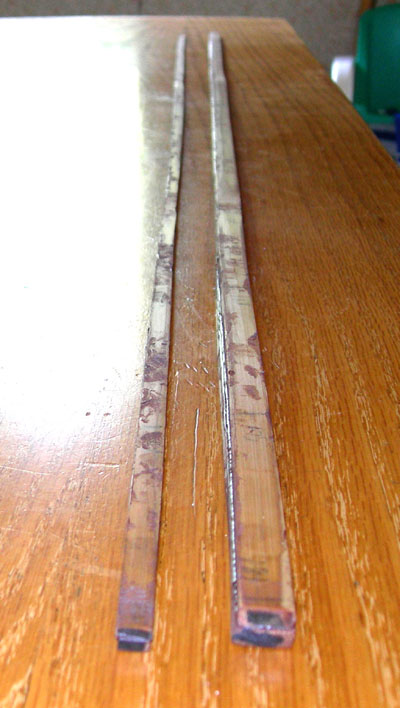
The subject of this tutorial is the building of a 2 strip quad bamboo rod with simple tools. A two strip rod, also known as a poor mans quad is easy to build, but difficult to straighten after gluing, so steps will be taken to assure that the rod glues up as straight as possible. Split the strips about 10% wider than the widest dimension of the rod. If the rod has a butt diameter of .300, the butt strips need to be about .330 wide, as split. Wide strips are difficult to straighten, so I strongly recommend that you soak them in water for about 24 hours. Follow the node straightening method found at this site as another tutorial, unless you have a preferred alternate method. Straighten the areas between the nodes also. When you have gotten the strips as straight as you can, clamp them to an angle, or other straightedge to dry for a couple days. The photos above show how to do it. This assures that the strips will not deform when drying.
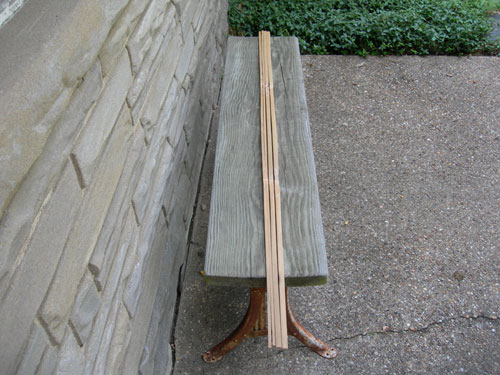
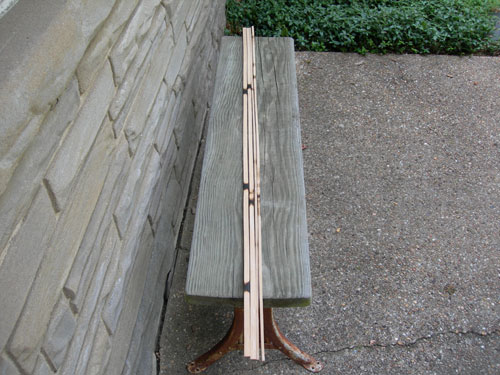
The photos above show a top and bottom view of the finished butt and tip strips. The scorching on the bottom from the alcohol lamp does not go deeply into the strip, because of the soaking. You can see, however, that the butt strips took a lot more heat to soften them, because of their width.
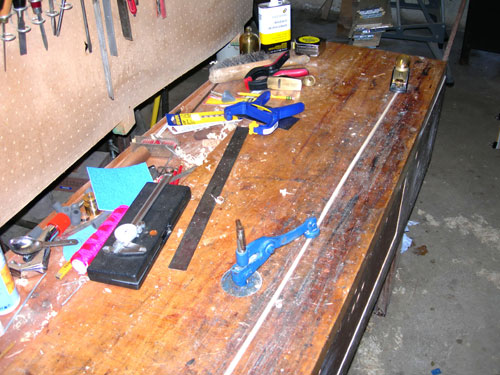
The outer enamel can now be removed from the strips with a scraper or sandpaper, as you prefer. Make sure you check the nodes for flatness. File away any remaining bumps.
If you have one, you can use a planer to hog off the pith side. Obviously, do not take off to much material. If you don't have a planer, use your hand plane, as shown in the next step.
You can now begin planing the pith side of the strips to taper. Mark the 5" taper stations on the enamel side of the strip, and plane and measure until you reach the half thickness dimensions for each strip. If you are working with cane that has previously been flamed or heat treated, you can go right to finished dimension. If you still need to heat treat, stop about .002 from final size for the tips, and a bit more in the butt strips. If you are heat treating now, again clamp the strips to a straightedge, like an aluminum angle to keep the strips straight. I used 1 1/4" wide spring paperclips, which resist the heat of the oven. If you don't have an oven for rodmaking, see if a pizza shop will cook them for you. 350° for 12-15 minutes should do it. After the strips are cooked, check for final dimensions, and plane a bit more if needed. If you happen to go a few thousandths too much in an area, make a note of it and leave the mating strip heavier in that area. If the glue line is off center by a couple thousandths, it won't matter. It helps to have good hold downs for the strip. Here I'm using a carpenters holdfast to clamp the center of the strip while planing the butt area, and a spring clamp to hold the butt when planing the rest of the strip. Hold the plane level, and measure often.
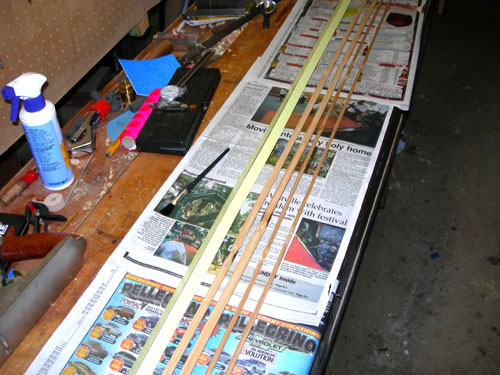
The strips are now ready to glue. Remember that many wood working glues require a moisture content in the bamboo to work correctly. If you have just heat treated, it's a good idea to moisturize the strips a bit. I use a household paintbrush dipped in water and shaken almost dry. You don't want water drops, just dampness. Do this about 15 minutes before gluing. If using epoxy, this is not necessary, and if the strips were heat treated a couple months ago, it's also not necessary. The object to the left of the strips is an aluminum angle, coated with yellow plastic tape to keep the rod from sticking to the angle.
Clamp the glued up strips to the taped face of the angle with every clamp you own. Here you can see I'm using paperclips, and a collection of small clamps. The tip is on one face of the angle, the butt on the other. I used resorcinol glue, which loves heat and humidity. We get a lot of that here in NJ.
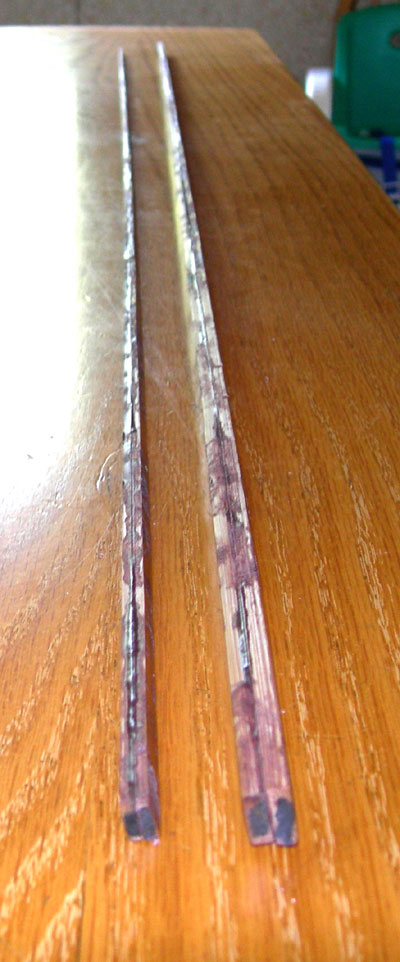
An edgewise and top/bottom look at the glued up strips. Sorry about the poor photos. The glue should now be carefully filed off the top and bottom faces of the rod sections.
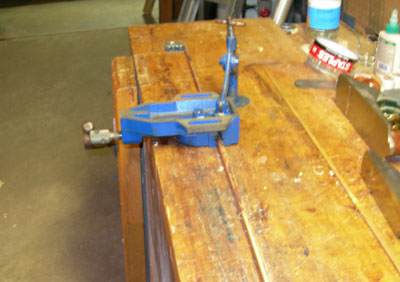
Devise some method of holding the sections on edge at 90° to the bench top. Here I'm using a drill press vise held upside down with the hold fast. A Jorgenson type woodworking clamp would be fine also. Alternate sides frequently at the beginning, and once again plane and measure until the side to side dimensions match the top and bottom dimensions. To finish the rod, you will need some ferrules. I usually go to the next size over that indicated by the flat to flat dimension, glue some cane strips to the blank just longer that the ferrule depth, then turn the area round. That way I don't take too much cane off the corners. I use truncated ferrules to keep the weight down. I don't know of a source for the special quad ferrules that those who make quads make for themselves. Another good scheme with these rods is the taped splice system. There should be information in other areas of this site on the splice method. Once you have addressed the ferrules, the rod can be finished with normal rodmaking methods. For a first attempt at this, I would suggest a short, light line rod, so you won't have to straighten wide strips, which can be a challenge. The bigger the rod you build, the more you will notice some directionality in the rod. Because of the increase in pith in the butt, the rod will be stiffer in the power fiber plane than it is side to side. Ignore that, and mount your guides on one of the power fiber flats, otherwise the rod will be too slow. If you have gotten the rod fairly straight it will not twist when you cast it. These are fun rods to build and fish, and I hope you enjoy the experience.
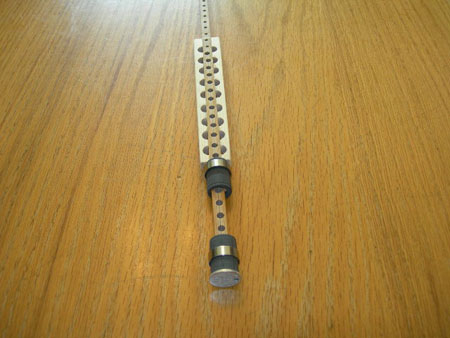
This rod was built for a weight restricted casting competition. The holes go about 1/3 of the way down the rod in different diameters, leaving about .070 wall thickness min. They are spaced at 2D intervals. This was an 8 foot 5 weight. The scheme worked pretty well, but I would not suggest starting with anything this radical. |