Bamboo Tips - Contraptions Planing Clamps |
|
< Home < Contraptions < Planing Clamps
Here are some pictures and/or drawings of planing clamps from various makers. If the name of the submitter is underlined, you can go to the submitter’s web site.
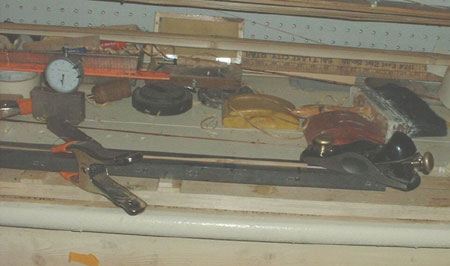
Tony Spezio
Ralph Moon
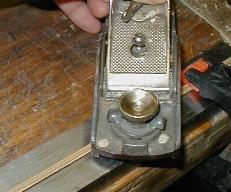
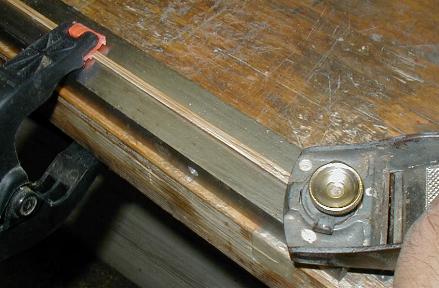
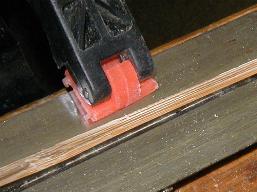
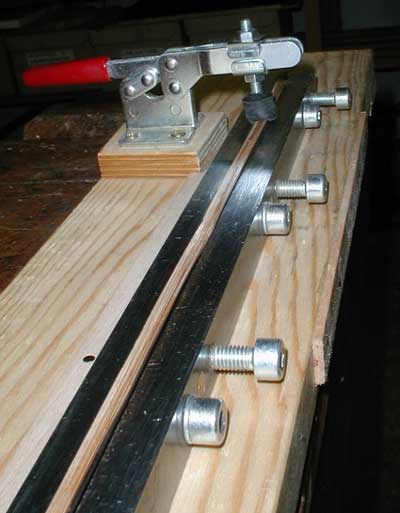
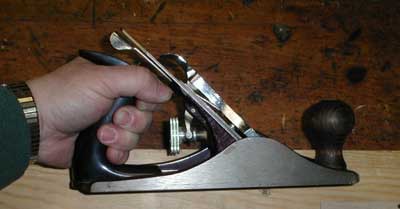
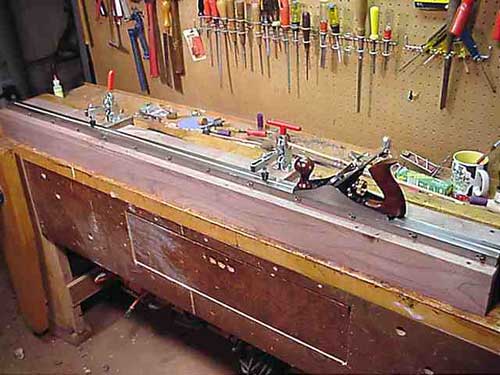
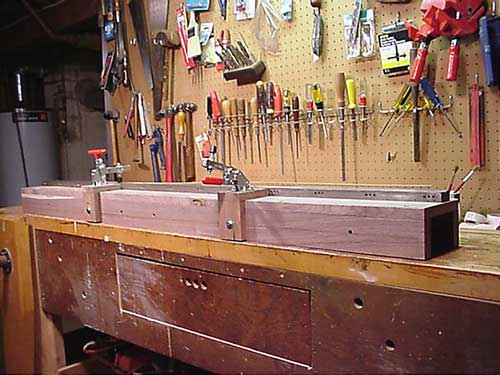
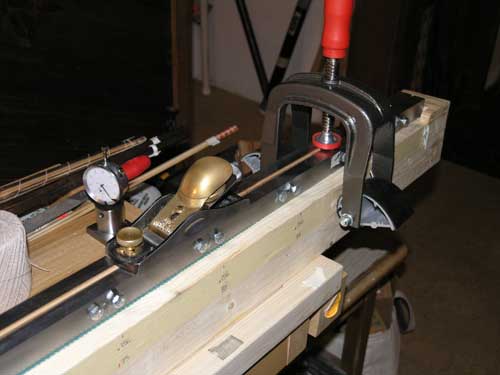
Photo 1 shows the front side of the jig, with two toggle clamps in place. In practice, one of them would always be swung back out of the way. (I got the toggle clamp idea from Carsten.) The jig solves two problems for me. It raises the forms to a better height for me, and provides clamps positioned at the end or center of any strip. The Plane in Photo 1 is a UK Stanley #3 retrofitted with a hock blade and rosewood handles.
Photo 2 shows the backside of the setup. There are several possible positions for the clamps to be fixed. Basically, I just drilled holes and backed them up with Tee Nuts wherever I thought I might need them. Dimensions of the jig are 5 feet long, 3" high, and 5 1/2" wide.
Dick Steinbach’s MHM Strip Clamps
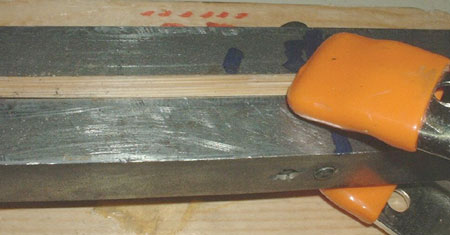
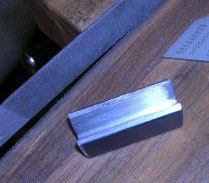
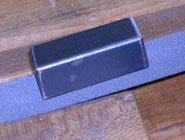
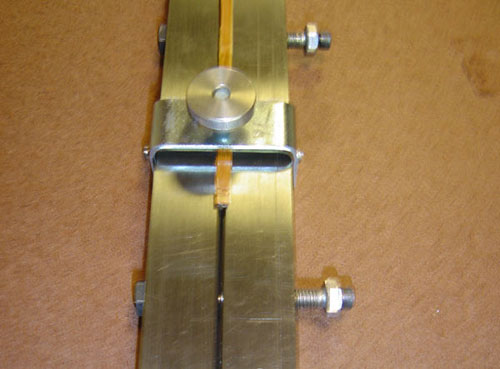
Some of us who use the MHM have had problems from time to time with the bamboo splitting when we have tried to screw the strip to the anvil and I have worked out what may be a new solution to the problem It consists of a rectangular clamp with a 60 degree mortised bottom which both holds down the strip and squeezes the splits together at the same time. (Of course for quads it would be a 45 degree mortise etc.) It has the advantage of being able to be moved up and down the anvil as needed and fits under the mill easily. It has considerable clamping power and so far in early testing the prototype works like a charm. It uses the screw-down system which Tom recommends and fits between the screw head and the anvil. Ordinarily the screw could continue opening the split rendering it useless but with the STRIP GRIP the more you tighten the screw because of the pressure created on the sides of the slope, the more the split tightens up and corrects itself. The steel one shown here measures 1/2" x 1/2" x 1 1/2" and the grove is 1/4" deep, but 5/16th would be better. I cut my steel to length and scored a line down one side with a hack saw. I clamped a three cornered file (60 degree) in the vise and ran the grove up and down the slot parallel to the edges for several hours until the desire depth was reached. Kind of takes you back to the days of making a planing form by hand. A 1/4" longer screw than the one provided with the mill definitely improves its efficiency and clamping power.
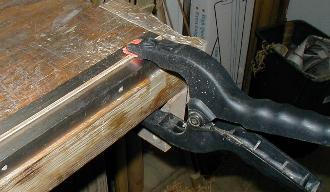
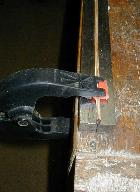
David Van Burgel’s Planing Clamps
Here is a pic of a planing clamp I am trying. It is an "edge clamp" used for gluing veneer or laminates. I elevate my planing forms on a couple of 2 by's and this allows the edge clamp to be used. They are fairly inexpensive and easily attached.
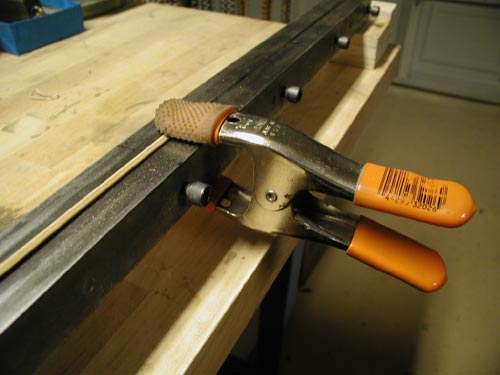
Ron Larsen’s Planing Clamp
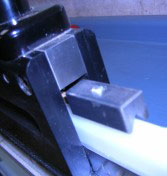
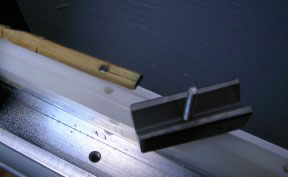
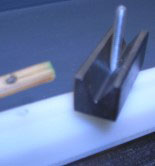
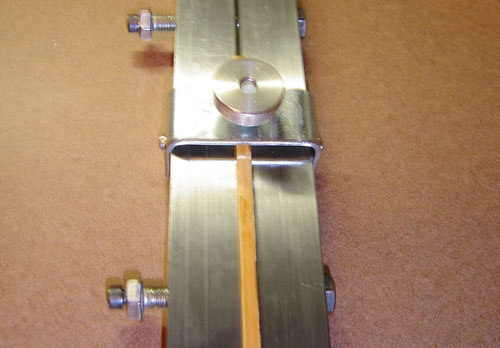
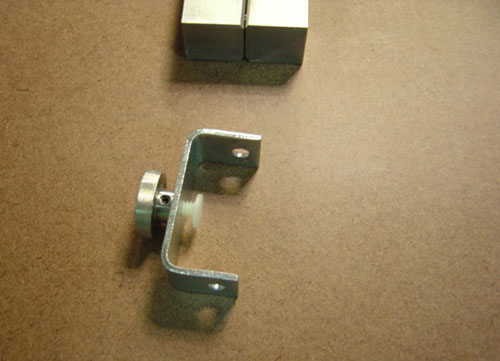
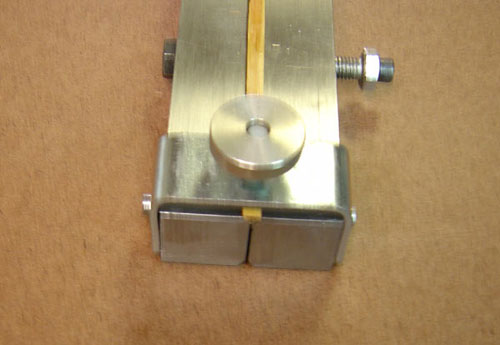
I needed a clamp to plane 6' strips for a one piece spinning rod. I bent up a "U" shaped bracket, drilled two holes in the legs slightly larger than the pins on my form & tapped a 1/4-20 hole in the top. I turned the slot off of a plastic screw, screwed it in the bracket & screwed on a knurled knob with a set screw to lock it in place. I holds quite well, even when I'm using a scraper.
|