Bamboo Tips - Contraptions Dip and Drip Tubes |
|
< Home < Contraptions < Dip and Drip Tubes
Here are some pictures and/or drawings of drip tubes from various makers. If the name of the submitter is underlined, you can go to the submitter’s web site.
Files: Larry Blan’s Dip Tube Volume Calculation Spreadsheet
Martin-Darrell
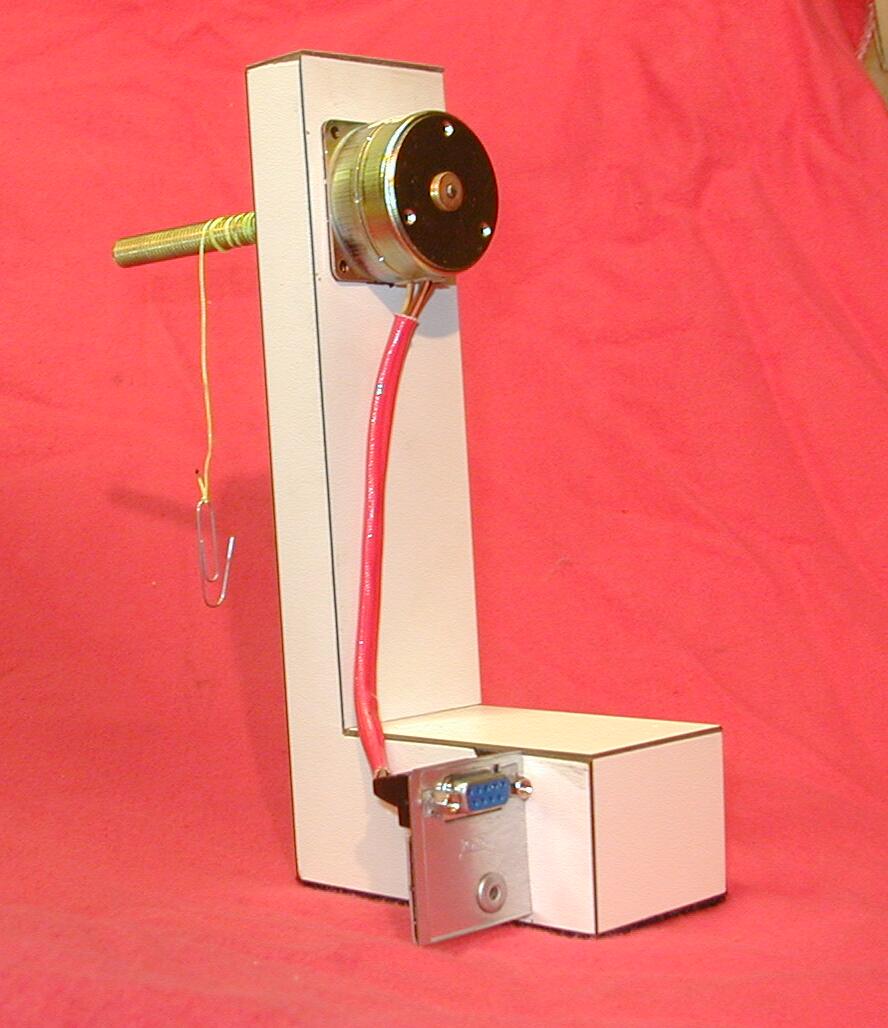
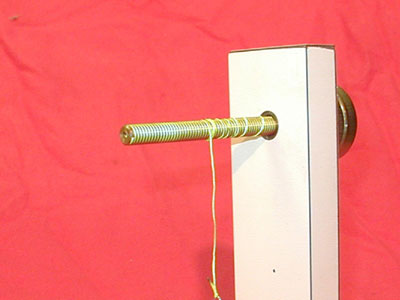
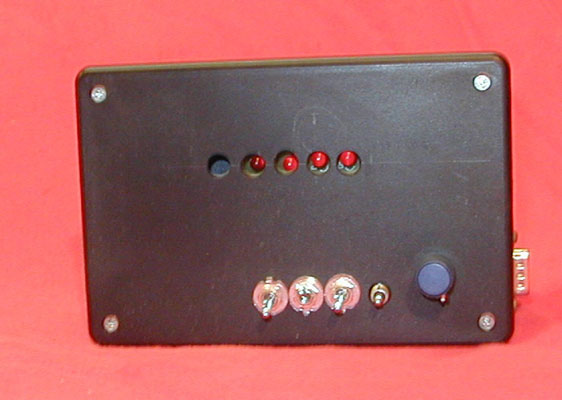
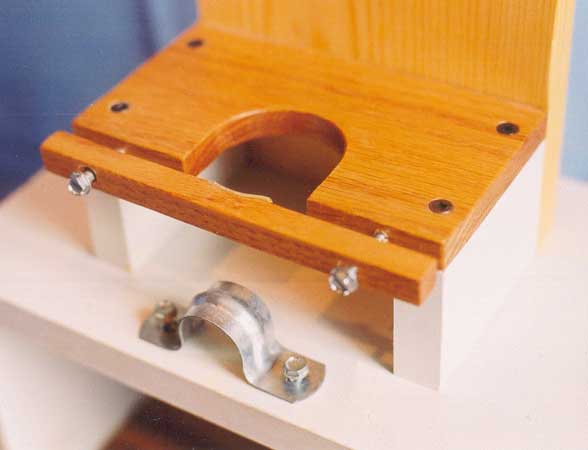
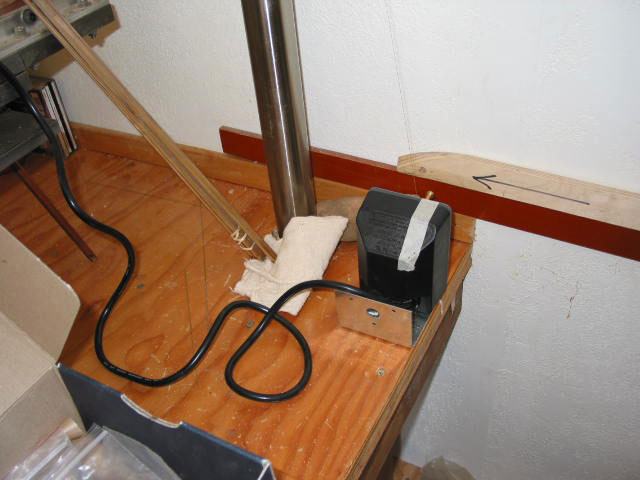
Tony Young and I were posting back and forth about motors for dip tubes. Tony mentioned using a threaded rod with a stepper motor to pull it back and forth. I pondered this for a while, and decided to grab a few bolts and see how the line would wind. I just chucked them in my lathe and turned the headstock by hand. Lo and behold, the line wound perfectly into the threads, without the need for a guide. I whipped up a spreadsheet to play with thread size and pitch, and discovered that a 4" length of 3/8-16 threaded rod will wind over 60" of line. I use 12# backing material for the line. A lot of folks are using this motor already, so nothing new except for the line handling method. The threaded rod gives very tight control over speed, the diameter is not constantly changing as line is taken up or let out. The stepper motor and controller are the ones sold by H&R (see the Rodmakers page). Part numbers are: TM93KIT2421 (kit) or TM93KIT2421/A (assembled unit). I whipped up the support from some scrap MDF, covered with scrap pieces of plastic laminate. Note the "scrap" theme here.. this works, and is cheap! I cut a 4" length of threaded rod, and simply drilled the end in the lathe to be a light press fit onto the motor shaft. I drilled intersecting holes on the free end of the rod. The line is run through the holes, with a couple of knots retaining it inside the free end. In other words, the line exits the rod directly into a female thread. I mounted the motor on the support, with only a 4" piece of rod, there is no need for a bearing on the "free" end of the rod. I just put the support on the top of my cabinet with double sided tape. The rod is about 6" above the top of my cabinet, which allows the line to thread without the need for any kind of complicated guide. The line passes through a small hole in the top of the cabinet. It could just as easily be mounted inside most cabinets. I used a scrap power supply from a long defunct laptop. The power supply and the controller are mounted in the plastic box (available from Radio Shack, etc). To connect the controller and the motor, I went back to the computer junk box and found an old serial connector and cable. If I were to buy something, I'd probably spring for a mini DIN connector and cable. A 6 conductor cable is required. The motor is connected to the control as shipped (the assembled unit). It could be used just that way, but I wanted to be able to disconnect the cable from the box and motor. As you can see, I cut holes to allow the LED's to be visible. Although they do more or less display the operating mode, who cares, once the best one has been determined. If I did it again, I'd simply bend the LED's over and forgo the holes, it would simplify the layout for the top of the box. Speed is infinitely variable, from waaay slow, to way to fast for our purposes. Motor is reversible, and stops instantly, one of the hallmarks of stepper motors.
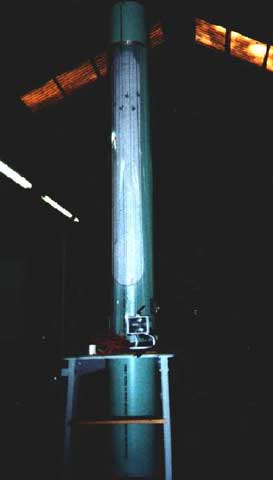
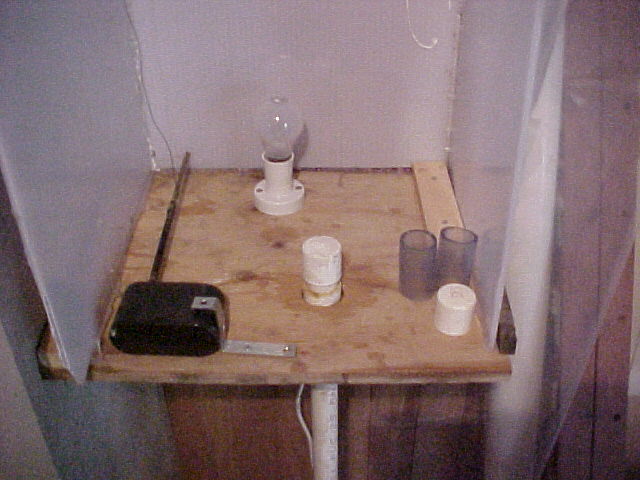
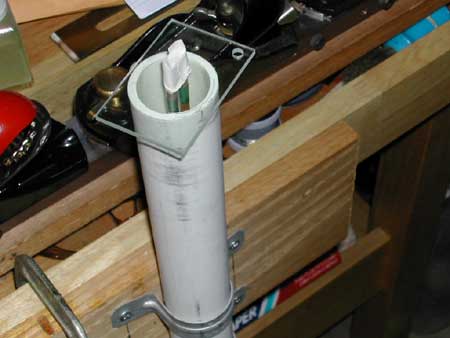
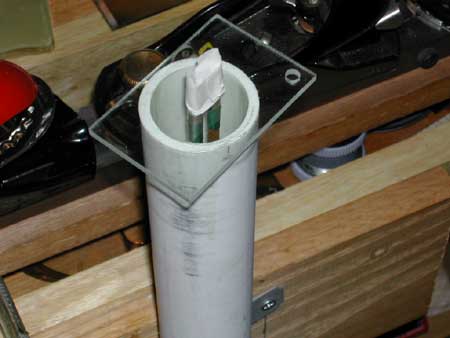
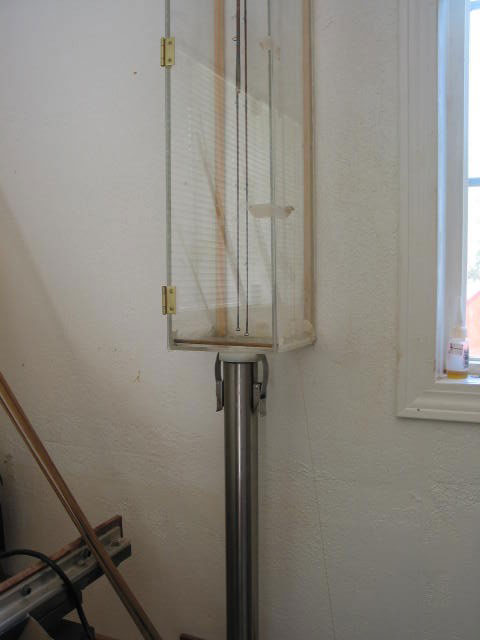
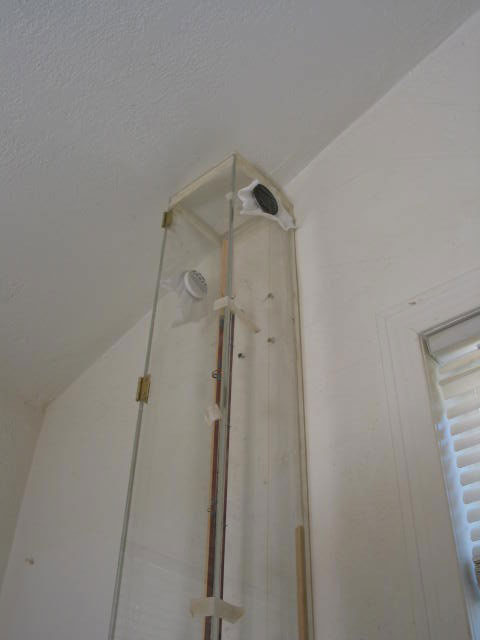
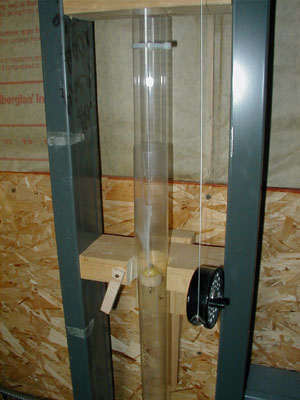
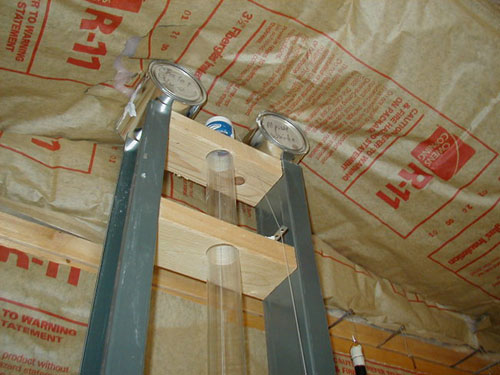
Above is a picture of my dip tube setup. It is fairly primitive but works well. There are three tips that may be of interest. 1. There is always a problem of the varnish rising in the tube when the rod is lowered into the tube. I take the cap off the tube and slip a 4 inch long piece of clear plastic tube over the outside of the dip tube. The clear plastic addition goes over the dip tube about 1 inch and extends about 3 inches. As the rod is lowered into the tube the varnish rises into the clear plastic section, rather then spill over the side. It also enables you to see when the guides etc. are nearing the top of the varnish and you can get ready to stop the motor. This enables you to keep the varnish level at the top of the tube when not in use. If the varnish level drops a little after a rod is dipped just drop a glass marble into the varnish and the level will rise again. The marbles also stir the varnish by inverting the tube a few times (with the cap on of course). 2. I used a simple BBQ turner motor. It is battery operated and has a simple on/off switch. I do not have it connected to a pulley but to a brass rod about 12" long. I used brass because I had some but wood or steel would do as well. The rod goes into the turner motor (the end was filled square to fit in) at one end and into a round hole in the wall at the other end. I experimented with different diameter rods until I found the diameter which when turned by the motor resulted in a withdrawal rate of about 3" a minute. The end of the string was attached to the rod with a touch of super glue and the string winds along the rod as the motor turns it. This provides a constant withdrawal rate. (Ray Gould's suggestion) The string goes to a cup hook at the top of the enclosure above the center of the rod then to a cup hook above the dip tube. 3. The third tip is to set up your motor outside the dipping enclosure, not inside like mine. It will make it easier to turn the motor on and off if you have a plastic curtain you pull across like I do.
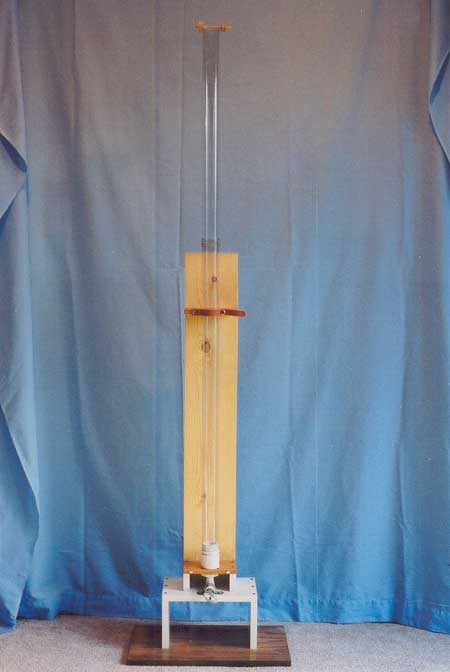
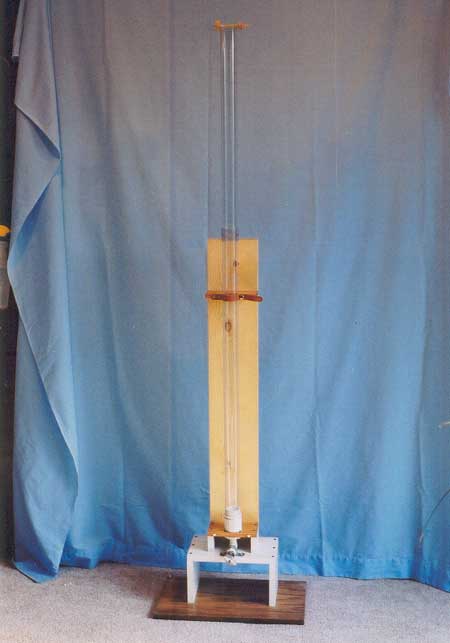
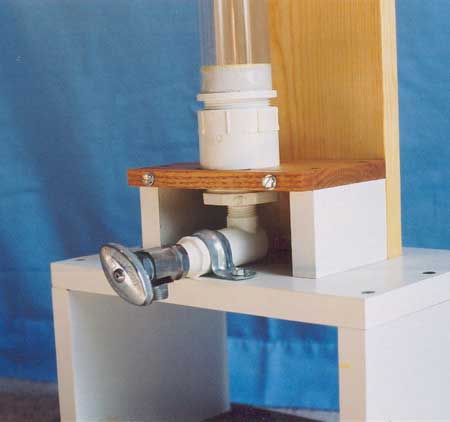
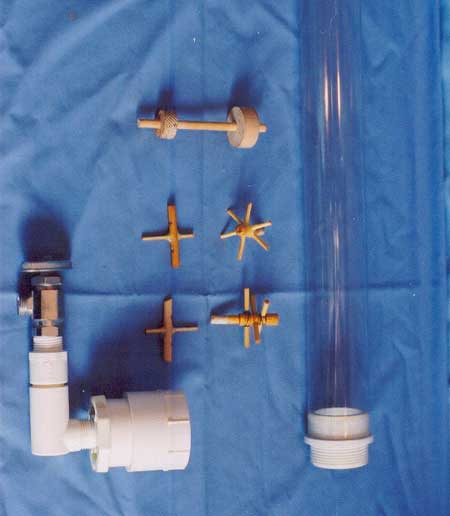
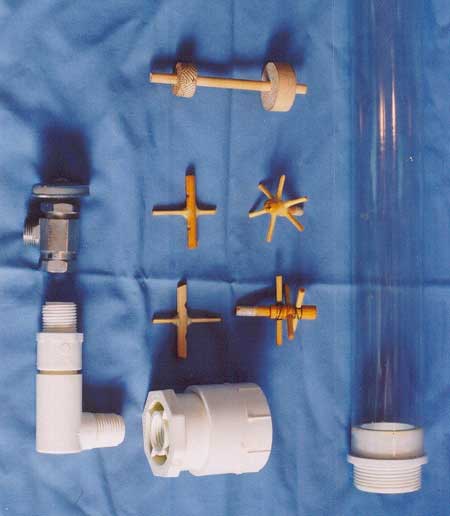
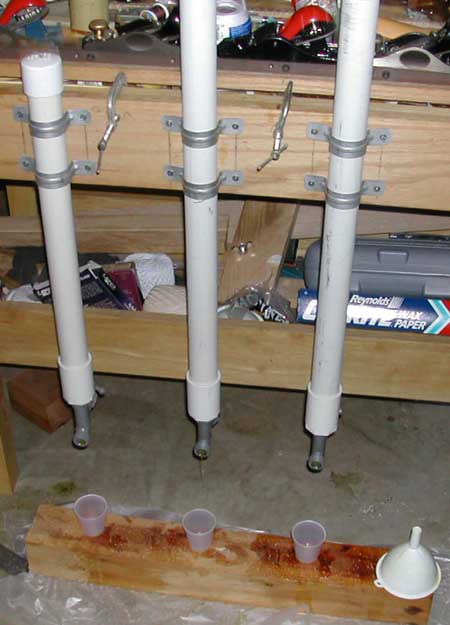
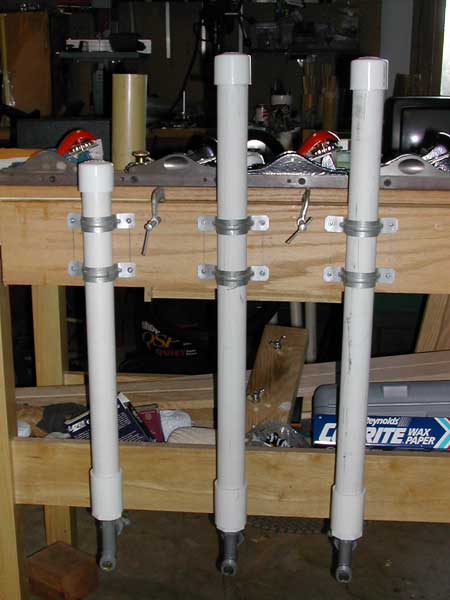
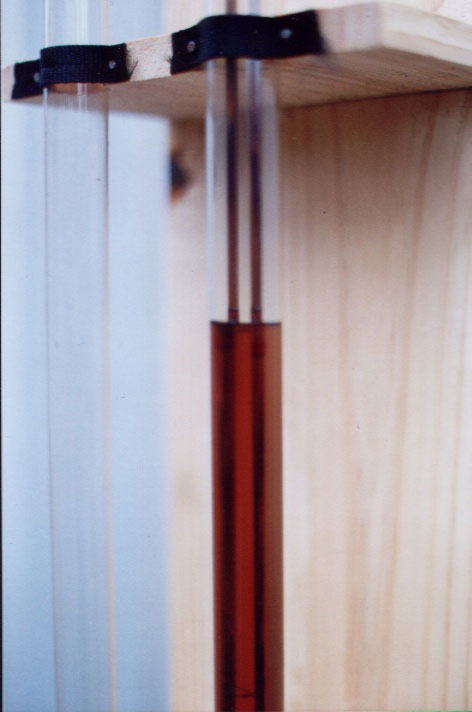
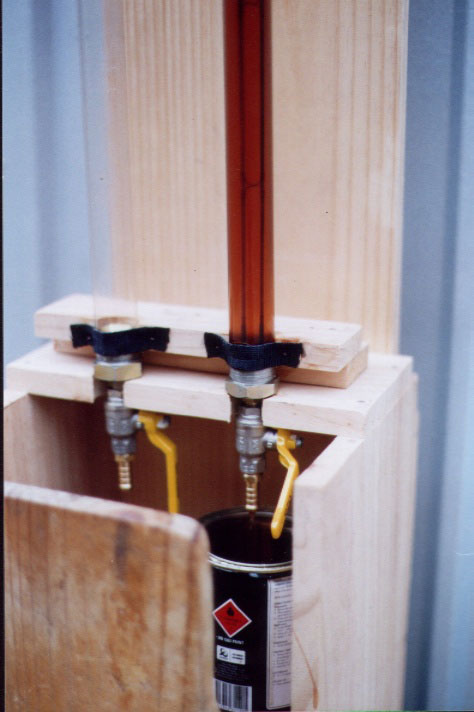
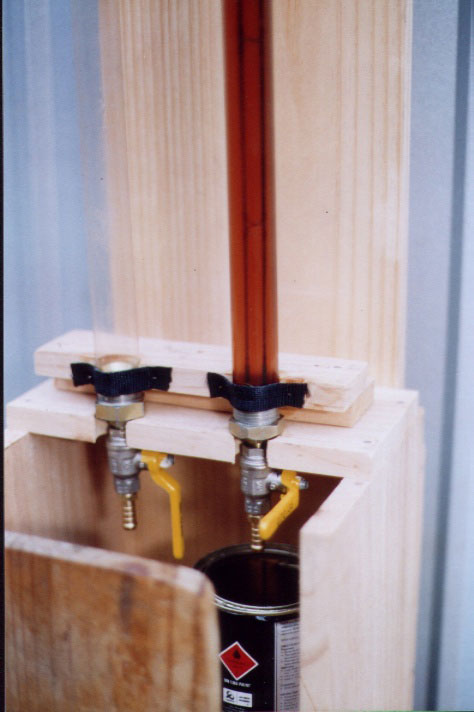
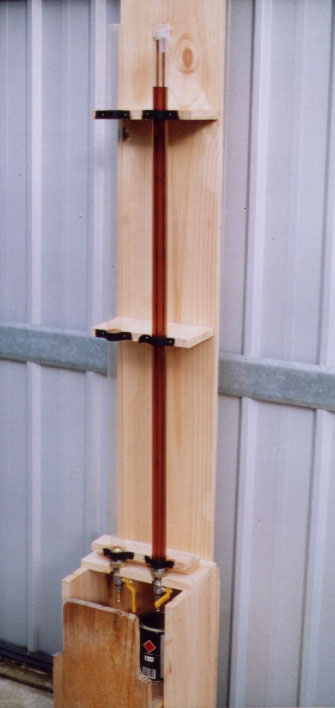
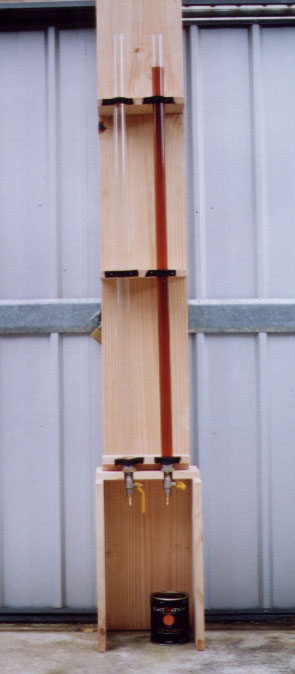
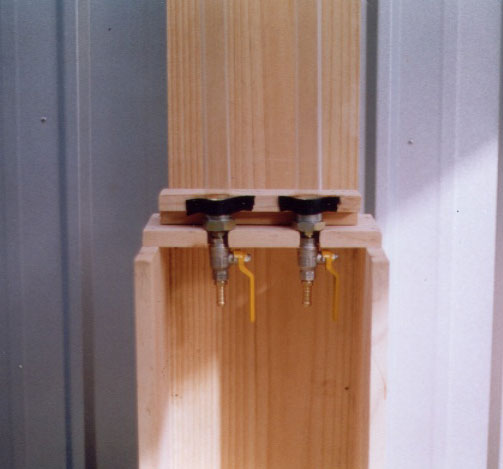
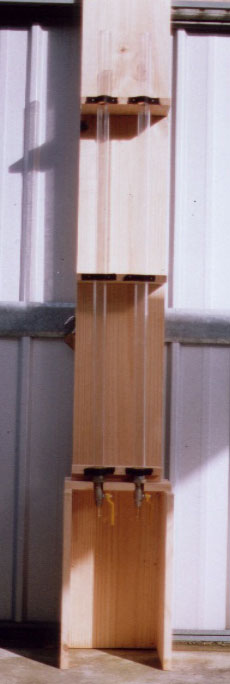
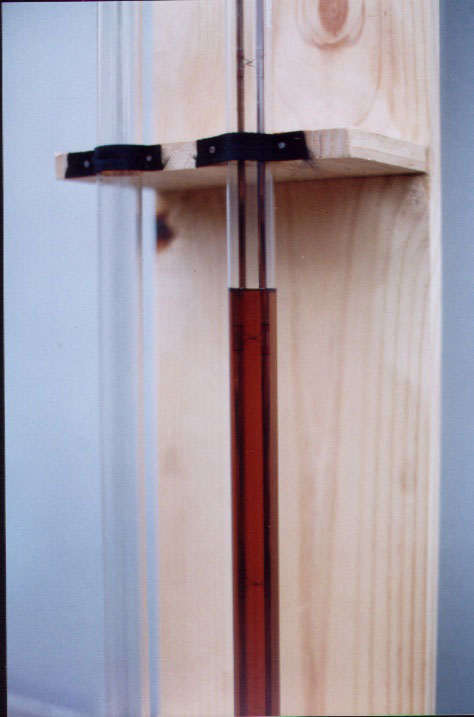
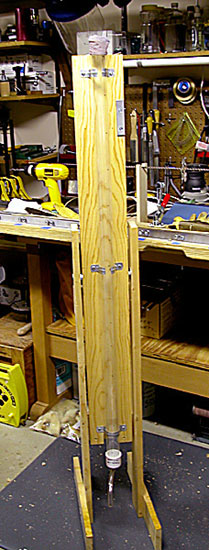
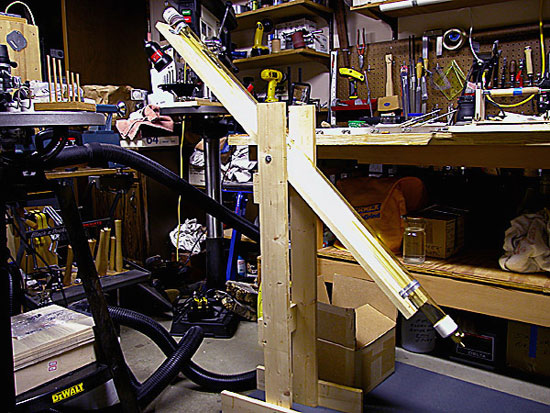
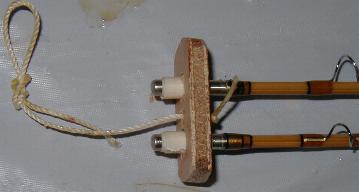
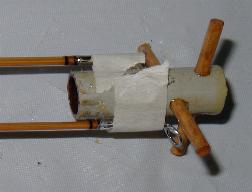
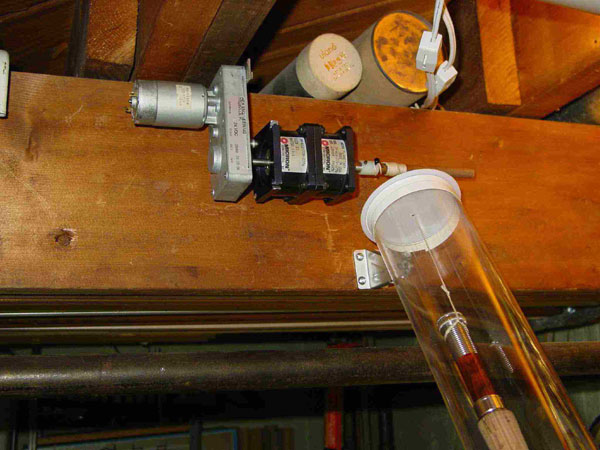
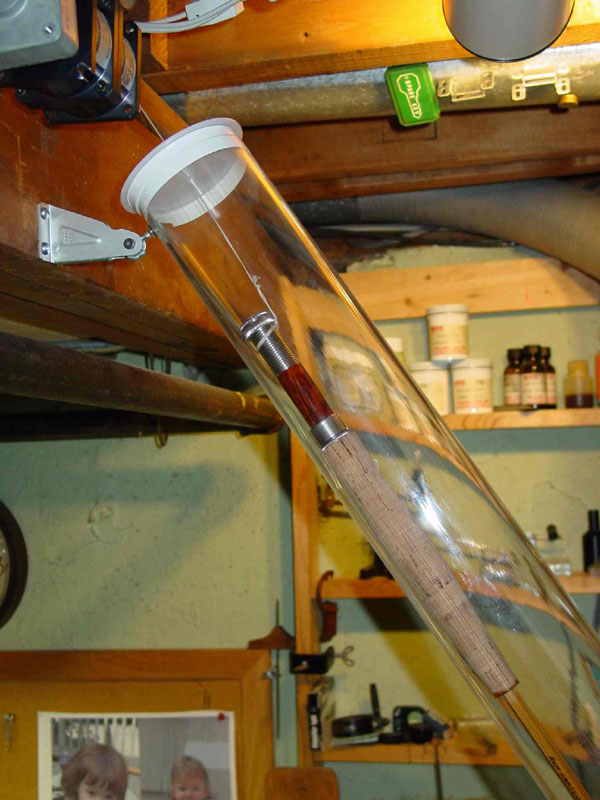
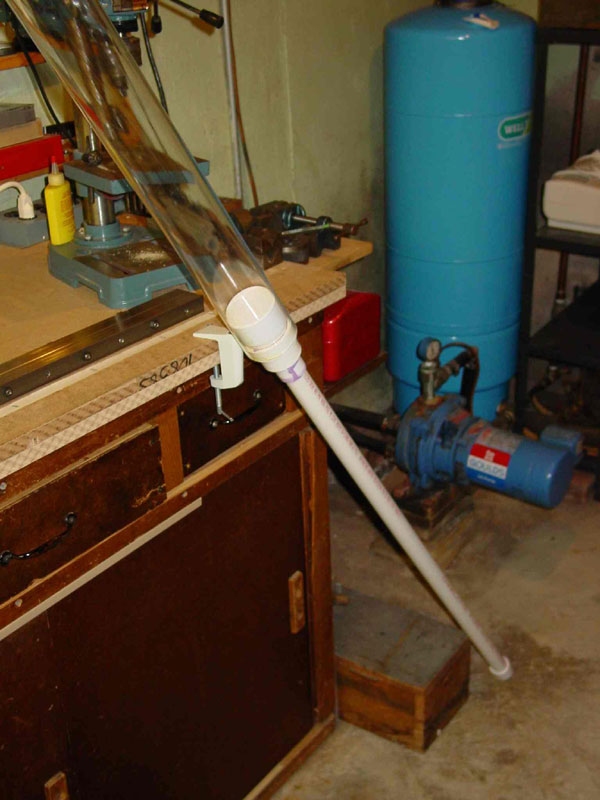
Here are the pictures for the drip tube I built. I got the clear plastic tubing from the Home Depot. They don’t sell it at the local store anymore, but you may find it at another store. It was originally sold as dust collector ductwork in their power tool section. It is 2” OD and 1/16” thick walled tube. The coupler was an accessory available in the display with the tubing. McMaster-Carr or Grainger sells the stuff in a couple of different types of plastics and I believe they have it in 6’ lengths so a coupler wouldn’t be needed. I got everything else from the Home Depot to make the fittings at the bottom and used PVC glued to put it all together. I just took the tube into the plumbing aisle and messed around with the pieces until I got the parts to fit together the way I wanted. I tried to leave as many parts as I could that would thread together instead of glued to facilitate clean up (which takes a while after use). The valve is a 3/4” right angle shutoff supply valve used a lot for toilet or sink installations. The stand is made from whatever I had left lying around in my shop, as you can probably see. But it works. I predetermine the depth of the varnish by holding the section up to the tube and mark the height with tape. Then I fill the tube (always double-check to make sure the valve is closed at the bottom before you fill - not that I ever didn’t do that, but it’s just amazing how fast varnish flows out of a wide-open valve...) using a funnel and pouring the varnish slowly down along the side of the tube to minimize any air bubbles that may form. It takes about 2 1/2 quarts to fill. I then let the whole thing rest for a few minutes to let air bubbles rise to the top if there are any. It’s never really been much of a problem for me. I varnish both tips at the same time. I tie them, using nylon wrapping thread, to the cross pieces with the guides parallel to the spoke used to center the sections in the tube and line them up evenly. I tie a thread to the rod handle or the cross piece attached to ferrules on the tip section (with the tip tops going down into the varnish) to the makeshift spool made from a 1/4” dowel and two cork rings. This allows you to lower the sections from the spool into the varnish to exactly the height you want. I keep the section at the height I want by pressing the cork rings together to cause a friction fit to the plastic tube (I filed 2 slots in the top of the tube for the spool to rest in). I back it up with tape to hold it all in place. This is one setup that might be improved on. I wouldn’t want the whole section to unspool and drop into the varnish, handle, reel seat and all...that has not happened yet. An empty quart can for the varnish sits below the valve to fill as the varnish drains from the tube. I use a clock to time the minutes and use strips of masking tape to mark the height of the fluid as each minute goes by. I can then measure the inches per minute as the fluid drains. I like to control of the valve. You can drain more slowly, around the guides if you want, and stopping the flow is precise at the bottom of the wraps or wherever you need to. For butt sections, mask the handle with tape. The plug, which I make specific to each ferrule size, is wrapped with Teflon pipe tape for a better seal and with spokes (made from bamboo skewers, of course) keeps the section centered in the tube, keeps varnish out of the female ferrule and prevents the section from touching the sides as it is drawn out of the tube. This is the most precarious point of the whole operation. Drain the tube completely (close the valve). Raise the section to the top of the tube with the spool so that you can get a hold on the piece. I then tilt or lean the whole setup over so that I can carefully draw the section out without having it scrap along the side of the tube. I can do it without help for a 9’ rod, others may want someone to hold the tube while they pull the section from the tube. You would definitely need to set up a system for sections longer than maybe 60” (some kind of stand to lean the tube on while the section is drawn out.) A chair back maybe? I hang the sections from a hook and clean the varnish from the guides with a Q-Tip and mineral spirits, and then put them in the dryer. Be careful how much you soak the Q-Tip. Too much thinner and it will run off the guide and onto the rod (a very bad thing to happen at this point) so squeeze most of the thinner from the Q-Tip (a tip from Bill at Corens). Hang the tips together to dry and remove them from the cross pieces after 24 hours. I pull the plug from the female ferrule before I hang the butt section. I clean the whole rig afterwards with mineral spirits and lots of paper towels. I fashioned a metal rod from 1/8” stock to push the soaked towel through the plastic tube. The rest of the pieces I can immerse in a plastic tub and wipe by hand. I also always take the valve completely apart and do the same cleanup on it. I hope that this gets you going with a drip tube. It works well for me and I like the fact that the whole thing is portable. I can move it out of the way in my small garage and can varnish inside the house if it is too cold outside. I would be hesitant to try and use a heat tape to warm the varnish. I don’t want to melt a column of finish onto the floor, although maybe a thicker plastic would work.
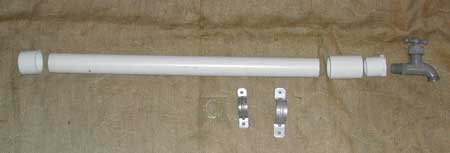
Bob Marbert Drip Tube
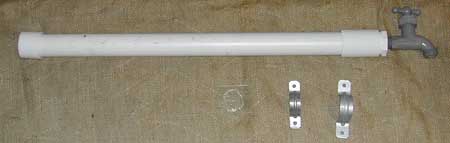
The component parts of a drain tube as I make it. From left to right are the following: Tube cap Tube (1 1/4 inch) Coupling (1 1/4 inch) Bushing (1 1/4 X 1/2) (This one is threaded for a 1/2" spigot; I prefer the one that's threaded for 3/4" spigot) Spigot (1/2", otherwise known as a hose bib) Pipe Clamp To fit the 1 1/4 inch pipe Below is a picture of the components assembled.
Andrew Chan Drip Tube
Mike Brooks Dip Tube
Jerry Snider’s Tilting Drip Tube
Tony Spezio’s Drain Tube Guides
Ron Larsen’s Drain Tube
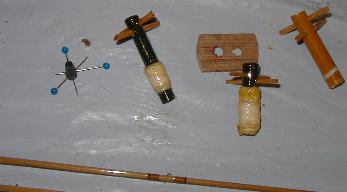
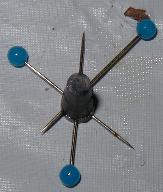
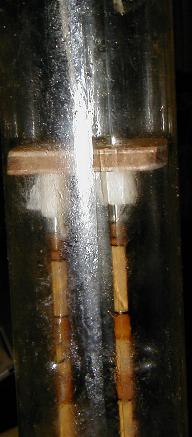
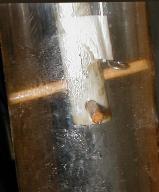
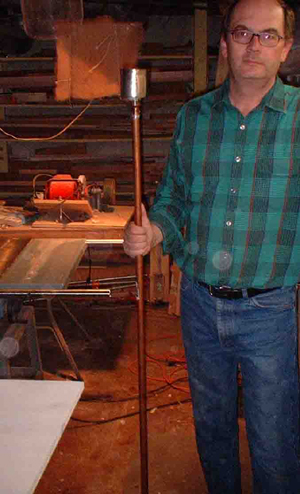
Frank Stetzer’s Low Volume Dip Tube
No, that’s not my scepter! It’s my low volume dip tube. If you only build a few rods a year, you end up discarding a lot of expensive varnish that goes bad before it gets used up. It may take a gallon of varnish to fill a regular sized dip tube. My tube is a 5 foot length of 1/2 inch copper pipe. the top half is squeezed into an oval with a vise and an empty shellac can is soldered onto the top for a reservoir. It only takes 18 ounces of varnish to fill it and I can dip just about any size rod with the guides on. The only thing that matters in a dip tube is the point where the rods leaves the varnish. I understand that archers use a similar gizmo for painting arrows in a skinny tube.
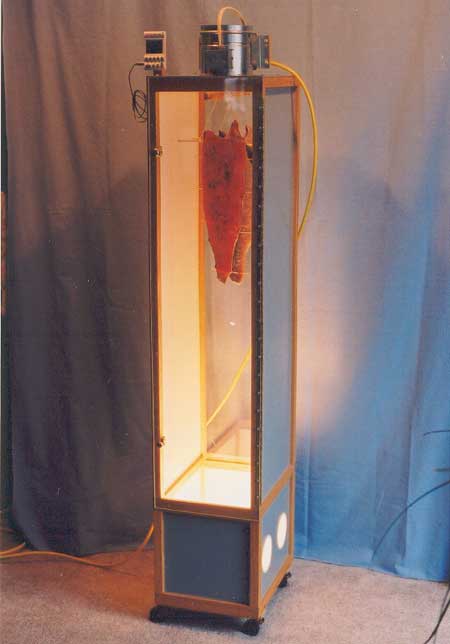
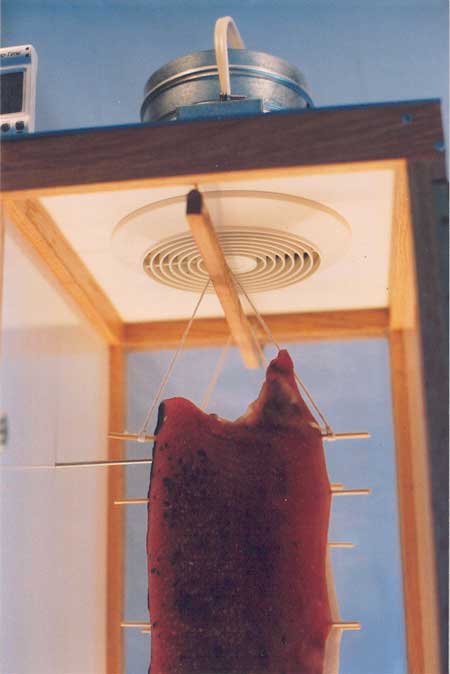
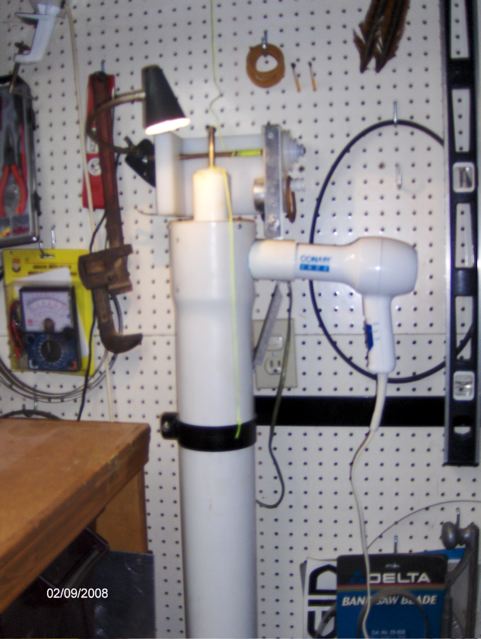
Don Schneider’s Dip Tube and Drying Cabinet
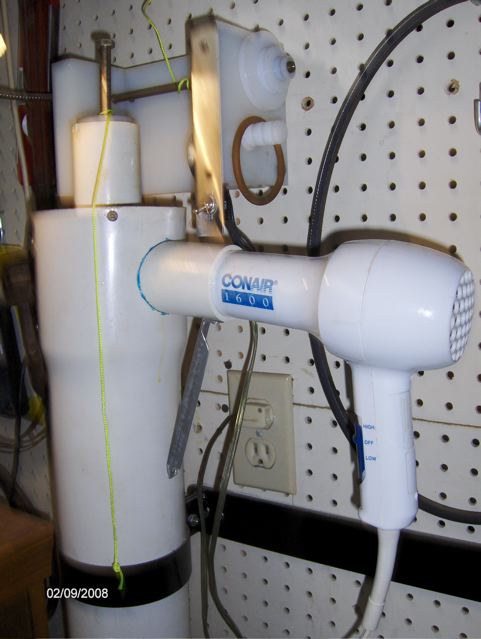
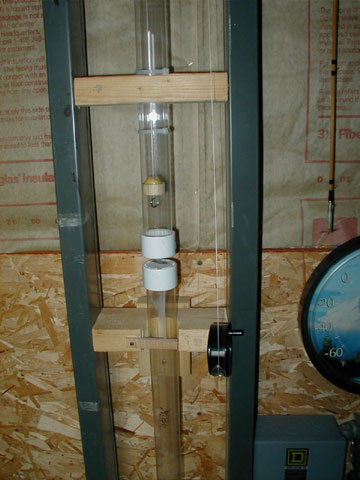
Dip Tube With Hair Dryer. There is a deflection plate inside the large tube so that the hair dryer doesn't blow directly on the varnish tube. Hole in the bottom of the large tube allow the air to get out.
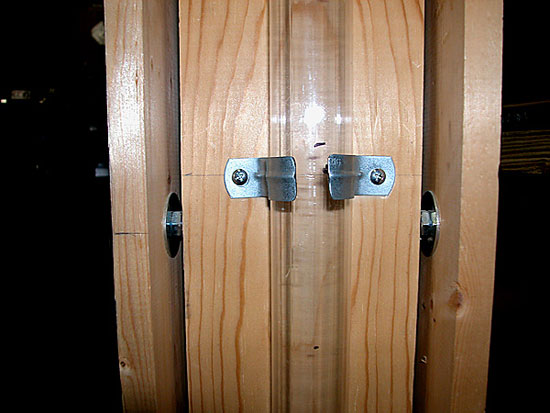
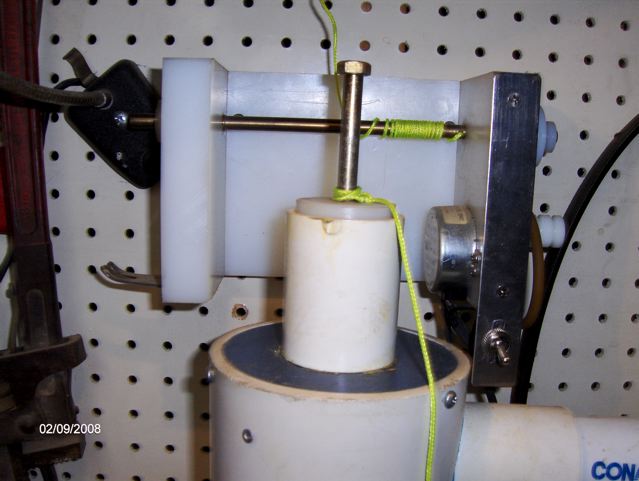
Dip Tube, pulling drive. Combination of pulleys and diameter of shaft gets from 1"/minute to 4"/minute. Use it on 1"/minute most of the time. Don't have to pause at guides on the slow speed.
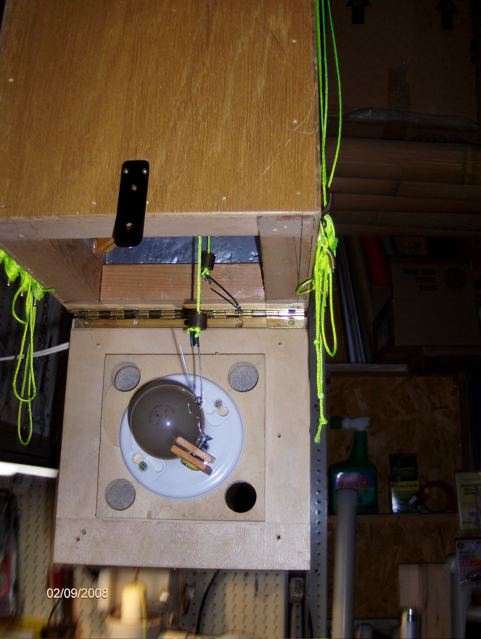
Bottom of drying cabinet. One filter is removed in this view. There are 4 holes in the top of the cabinet but no filters in them.
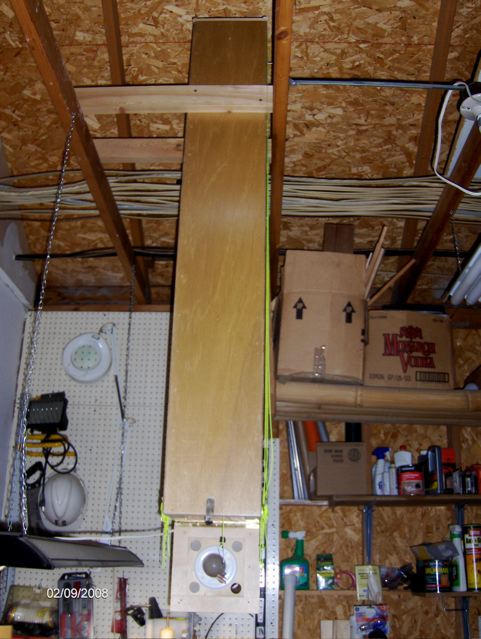
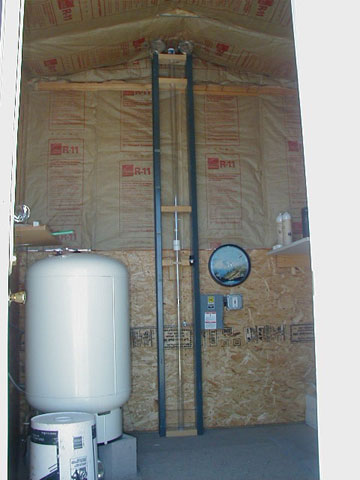
Insulated Drying cabinet. 10" square x 5' long. Mounted high enough I can walk under it with the door closed. Holds 6 sections. To pull the section into the cabinet, pull one of the strings on the side and tie off on one of the cleats. Regulate the heat with dimmer switch on bulb. If you look close, there is a thermometer near the top on the right hand side, (brass dash).
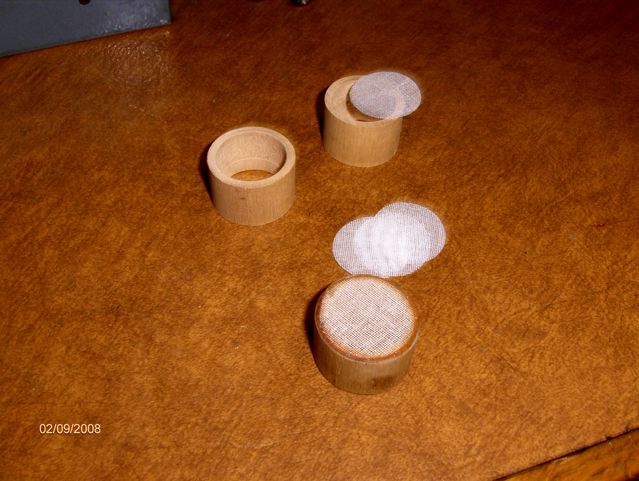
Dust Filters
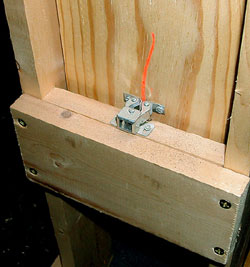
Dip Tube drive and cap. Cap has two "O" rings top & bottom. 1/16" hole through cap so when you push the cap down air inside the tube escapes.
Chad Wigham’s Dip Tube
|