Bamboo Tips - Articles |
|
< Home < Articles < Fitting Ferrules by Hand
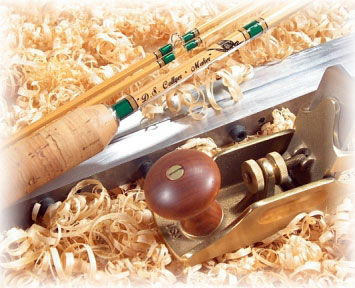
Fitting Ferrules by Hand By: Dave Collyer
Copyright © 2003 David Collyer ~ All Rights Reserved When I started building Bamboo Fly rods one of the most intimidating tasks was Setting and Fitting Ferrules. All the books I read or in talking with others said "you have to have several hundred dollars worth of power tools to accomplish this task correctly" Well, already spending a boatload of money purchasing the other required tools of the trade, I set forth to develop a method of safely and accurately completing this task with very inexpensive hand tools. The following is a collection of new, old, begged & borrowed ideas all coming together to complete this task at your kitchen table while sipping on your morning coffee... Step 1: Cutting the Cane and Ferrule Size... Tools you will need is for this operation are: Mic and cut blanks to length, taking care to get as smooth as possible transition between the sections at the ferrule station. Slight drops are not a problem but try and stay with in .008"/.010"... I plane my blanks 6" over desired length. This will allow you to get a better transition at the ferrule station as you will have some cane to play with. Also this will allow you to beef up or lighten up the action by cutting the blank one station up or down the cane... As a general rule on a two piece rod I cut my butt sections 1/2" shorter then the tips, or the exact length of the desired rod divided by two...(i.e. 8'/two piece / butt 48" / tip 48.5")This will get you within 1/8" to 1/4" of the finished rods desired length and works very well, but you can do the math and figure out the exact measurements if desired... To figure out the size ferrule that will be needed, take the average dimension of the three flats at the ferrule station and times by 64...(i.e. .195" x 64 = 12.48 a 13/64's ferrule is needed) I always round up on the ferrule size as not to cut into the power fibers, but this may not be the case if the station is real close...(i.e. .189" x 64 = 12.10 a 12/64's ferrule is needed) The object is to get the station round without cutting into the power fibers or leaving flats in your finished station... Note: On the butt section measure 1" down from the cut to get your flat average and on tip sections measure at the cut to get your flat average as this will be your largest dimensions in most cases...
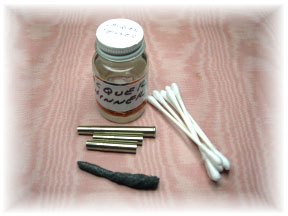
Step 2: Cleaning and prepping the Ferrules... One of the most overlooked and neglected task is cleaning and prepping the ferrules correctly, a job is only as good as the prep work! This is probably one of many reasons a ferrule can fail, as there is often left over oil and grime in the ferrules from the machining process... Tools you will need is for this operation are: Now we know the ferrule size needed, we need to prep the ferrules. Inspect the slide area of the female ferrule for burrs and drops of solder as these can play havoc later on. Roll up some steel wool and twist into the slide area of the female ferrule, keep twisting with your fingers for several minutes. This will polish the inside of the slide area, allowing for a smooth fitting later on in the process. Dip a Q-Tip into the lacquer thinner and clean ALL insides of the ferrules, keep using new Q-Tips till there is no grime present on the Q-Tip...
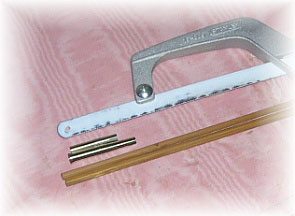
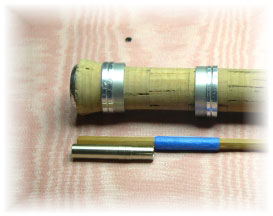
Step 3 & 4: Prepping the Cane to Receive the Ferrules... Pliobond is a contact cement and will NOT fill gaps in your station, so it is very important that you get a "good" fit of the ferrule to the cane... A good fit is where the ferrule slides on the station with just a little resistance then "clinks" when it bottoms out on the moisture dam and has no play... Tools you will need is for this operation are: Now we must measure and mask off the blank. With a toothpick determine the depth of the female ferrule by inserting it into the tab side of the female ferrule and making a pencil mark on the toothpick, transfer that measurement to the butt section and mask off. (Some machined ferrules will have a concave at the moisture dam, measure to the bottom of the concave and slightly round off the leading edges of the station on the cane when sanding to fit.) With the tip sections lay the male ferrule next to the blank and mask off, allowing for the thickness of the moisture dam on the male...
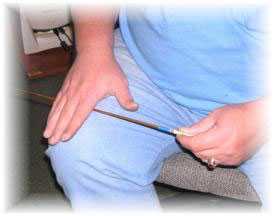
This next step can be done right or left handed, so name your poison. Take a 2" x 4" 150 grit sand paper and fold in half, making a 2" x 2" pad with the grit out on both sides. Fold the pad over the butt section station, holding it in place with your thumb and forefinger. Lay the section across your lap and roll the blank back and forth with your other hand, moving the sanding pad up the down the station slowly removing the cane by sanding. Note: Check fit often and remember the leading edge of your tip sections is the largest measurement on that station and the masked side of the butt section is the largest measurement on that station. I normally round off the points a little and level the whole station down just above finish size, then work on the front half of the station first to fit, then work back towards the masking to get a good fit. Special Note: You get better traction with bare skin on your lap (no comments from the SRG crowd :~)
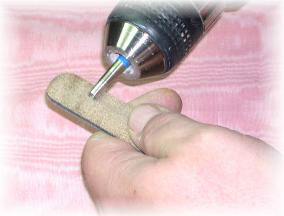
Note: Step-down ferrules can be done in the same manner as outlined above. The shoulder diameter is sanded the whole length of the station, then the step down is marked on the station and brought down to the desired diameter leaving the shoulder diameter intact... Step 5: Dressing the Ferrule tabs... Tools you will need is for this operation are: Now that we have a good fit on the ferrules, we can dress the ferrule tabs. This eases the transition from the metal to the cane and done correctly alleviates stress cracks in the ferrule wrap after fishing the rod... This can be done by hand and a nail file or by masking off the ferrule and chucking it up in a cordless drill... Normally the tab area is tapered from .015" wall size down to a .008" wall size at the open end, we want to keep this slope and take the tabs down by sanding to a .003" wall thickness at the open end... Start with the 220 grit nail file to remove most of the material, then when close to finish size smooth out with the 400 grit nail file. A correctly dressed tab will flex at the tip when a little pressure is applied with the finger nail. Be careful not the feather out the edges to much as they can collapse and fold when installing them on the cane, this does not look nice under a translucent wrap...
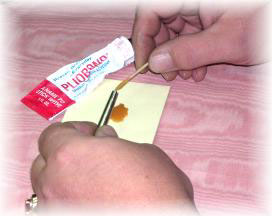
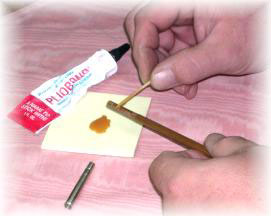
Step 6: Installing ferrules with Pliobond. Make sure the Pliobond is well mixed in the tube, it should be an opaque tan color not a translucent amber color. Shake tube for two minutes, one minute with the cap down and one minute with the cap up. Store Pliobond tube in an old cup with the cap down, this will place the solids in the glue towards the cap and allow easier mixing in the future... Tools you will need is for this operation are: Apply about two drops of Pliobond inside of the female ferrule with a toothpick, taking care to coat the whole inside of the ferrule including the tabs. Seat ferrule in place on cane and twist, then remove the ferrule and apply one more drop of Pliobond inside of the ferrule. Then coat the cane with about two/three drops of Pliobond going just over the station onto the blank...
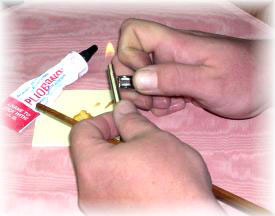
Heat the female ferrule with a Bic lighter at the moisture dam, rotating the ferrule as it heats (you will hear the Pliobond bubbling) then move the flame down the ferrule to the open end and it will flame out. As the ferrules is flaming apply the Bic flame on the cane while rotating the blank and let it flame out... While the ferrule is still hot press it on to the cane station and align the tabs with the flats, you can use the side of your bench to press on the ferrule but be very careful. Roll the very tips of the tabs with the round shaft of a screw driver to set them in place. Roll the lose excess glue off with your finger, then use lacquer thinner to clean up the rest. There might be some dark spots on the tabs where the glue burnt and will not come off, Sand this off and redress the tabs with the 220 grit nail file by hand. To finish out the tabs, use #0000 steel wool and buff to a bright finish by holding the steel wool with your thumb and forefinger on the tab station and rotating the blank on your lap as we did in sanding the cane station before...
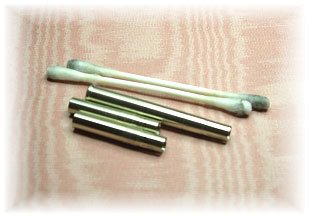
On the male ferrules use a pair of leather gloves as we will do it the same as outlined above but you will heat the closed end first, then rotate the ferrule in your gloved hand and flame out the open end of the ferrule... Caution must be used not to get the ferrule too hot or you will weaken the metal and/or melt the solider on ferrules made from tubing... Mastering the skill to set ferrules in this manor will result in a bond that will last 50+ years, no matter the temperature changes or climate changes but can be removed with a little heat if needed... Pliobond is a contact cement and if done correctly will allow you to lap the ferrules as soon as it has cooled. No amount of "drying time" will help set the bond after it has been flamed, so if it's going to fail it's best to know now and you can clean up the ferrule and station with lacquer thinner and try again... Step 7: Lapping the Ferrules... Tools you will need is for this operation are: We will use the same "lap" method to lap the ferrules as we did to sand the station on the cane above. Most male ferrules are .002" to .003" over the desired size, they also tend to be larger at the leading edge of the male ferrule...
Tape off the ferrule so only the slide area on the male ferrule is exposed, use the 220 grit to put a light general lapping on the ferrule, then switch to the 600 grit to smooth out. Spray a little WD-40 on a clean cloth and apply to ferrule every time you try the fit. I generally work on the leading edge of the male ferrule first then work back to the masking, checking fit every few minutes as I proceed... As you get closer to fit you should only use the 600 grit and buff with the steel wool before applying WD-40 and checking the fit... Take your time and go slow, as you get better at the method you will have a better feel on how it's going and you will get faster... A properly lapped ferrule will seat/unseat with just a little pressure and "pop" when the joint is pulled apart...
|